Master streetwear layering: guide to creative urban style
You’ve got the pieces. The graphic tees, the oversized hoodies, the clean sneakers. But somehow, every outfit still feels like it belongs to everyone else. That’s the gap layering fills. When done right, layering transforms basic streetwear into a visual statement that’s unmistakably yours. This guide breaks down the principles, the must-have items, the step-by-step techniques, and the creative mindset behind standout layered looks. Whether you’re just starting out or ready to push your style further, you’ll walk away with a clear, actionable approach to building outfits with real depth and personality.
Table of Contents
- Understand the basics: Principles of streetwear layering
- Gear up: Essential items and preparation for standout layering
- How to layer streetwear: Step-by-step creative techniques
- Avoiding mistakes: Common pitfalls and pro adjustments
- Making it yours: Personalization and next-level layering inspiration
- Why true personal style means breaking the layering rulebook
- Ready to level up? Shop the best layering essentials
- Frequently asked questions
Key Takeaways
| Point | Details |
|---|---|
| Master layer basics | Understand and use base, mid, and outer layers for a balanced streetwear foundation. |
| Experiment boldly | Mix weights, lengths, and colors to express your unique style beyond conventional rules. |
| Avoid bulk and clutter | Limit to three layers and stagger lengths to keep looks clean, comfortable, and sharp. |
| Personalize your look | Make layering your own with signature combos, unexpected textures, and visible details. |
Understand the basics: Principles of streetwear layering
Layering isn’t just throwing on extra clothes. It’s a system. Streetwear layering follows a base-mid-outer structure where each layer stays visible, creating depth and complexity in the overall look. Once you understand that structure, you stop dressing randomly and start building intentionally.
Here’s how the three layers break down:
- Base layer: Sits closest to your skin. Think fitted tees, tanks, or long-sleeves. Light fabrics around 120 to 160 GSM (grams per square meter, a measure of fabric weight) keep this layer breathable.
- Mid layer: Adds bulk and personality. Hoodies, flannels, and sweatshirts in the 180 to 250 GSM range work best here.
- Outer layer: The statement piece. Bombers, denim jackets, parkas, and blazers all work. This layer frames the whole outfit.
The key concept is peeking, where each layer shows at the hem, cuff, or collar to signal depth. Without visible peeking, you just look bulky.
| Layer | Examples | Fabric weight |
|---|---|---|
| Base | Fitted tee, tank, long-sleeve | 120-160 GSM |
| Mid | Hoodie, flannel, sweatshirt | 180-250 GSM |
| Outer | Bomber, denim jacket, parka | 250+ GSM |
Classic layering follows a three-layer rule: one of each. New-school hyper-layering (stacking multiple mid layers or two outer pieces) pushes that further, but it demands more precision. Check out these foundational layering steps to build your base knowledge, and explore layering with accessories to extend the concept beyond clothing.
“The goal isn’t to wear more clothes. It’s to create a visual conversation between pieces.” That mindset, echoed by designer layering advice, separates intentional style from random stacking.
Gear up: Essential items and preparation for standout layering
Knowing the structure, let’s get specific with the must-have items and prep work that set up expressive layering.
A strong layering wardrobe doesn’t require a massive closet. It requires the right pieces in the right weights. Base layers like fitted tees at 120 to 160 GSM, mid layers like hoodies at 180 to 250 GSM, and outer layers like bombers should each stay visible in the final look.
Here’s a quick reference for building your layering wardrobe:
| Category | Must-have pieces | What to look for |
|---|---|---|
| Base | Graphic tee, long-sleeve, tank | Slim fit, visible print or detail |
| Mid | Hoodie, open flannel, crewneck | Contrast color, interesting texture |
| Outer | Bomber, denim jacket, trench | Structured silhouette, unique hardware |
Beyond the pieces themselves, fit matters more than brand. A mid layer that’s too tight hides your base. One that’s too loose swallows your outer. Aim for a slight size progression: fitted base, relaxed mid, structured outer.
Pre-layered items are a shortcut worth knowing. Some pieces are designed to look like two layers in one, like a hoodie sewn into a jacket or a tee with a built-in collar layer. These give you instant complexity without the bulk. Check out creative item choices for specific picks, and explore pattern mixing for layering to level up your fabric combinations.
Pro Tip: Organize your wardrobe by layer type, not by color or season. When you can grab a base, mid, and outer in under a minute, you’ll experiment more and stress less.
For runway-level inspiration, Milan street style shows how professionals stack pieces with intention and precision.
How to layer streetwear: Step-by-step creative techniques
With clothes and concepts in place, here’s exactly how you can layer like a streetwear pro.
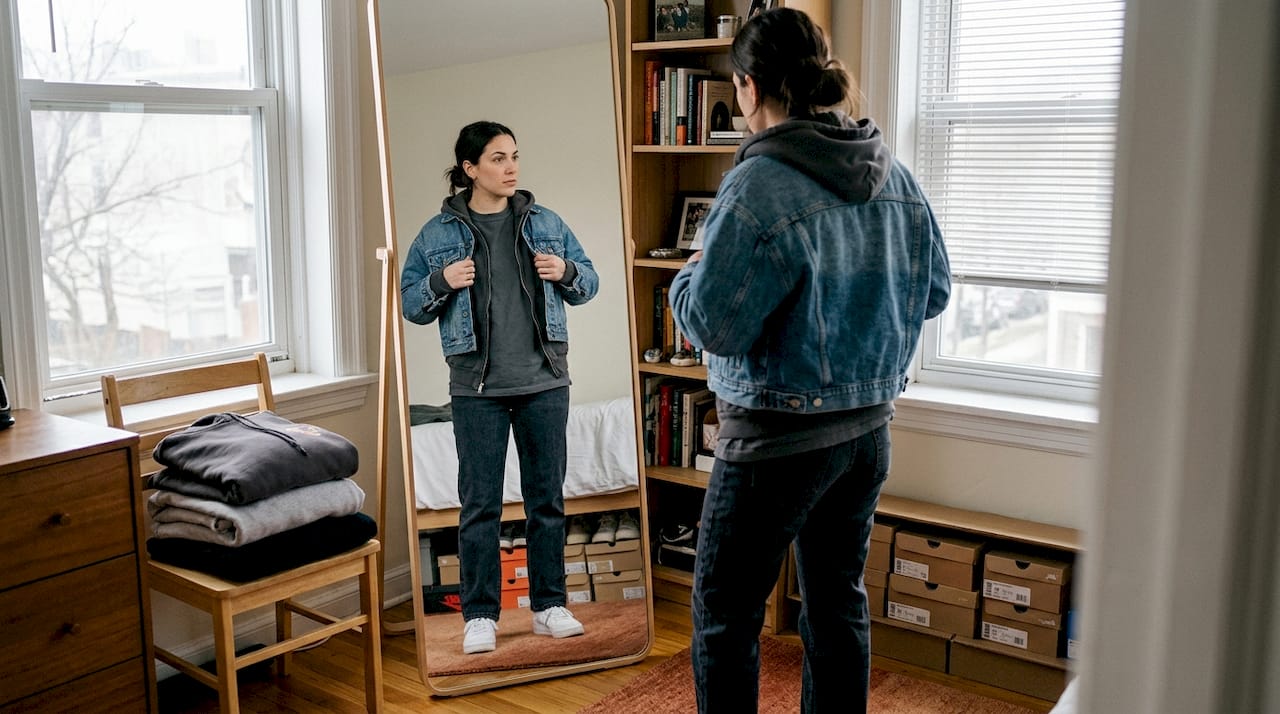
Step 1: Start with your base. Put on a fitted graphic tee or long-sleeve. This is your foundation, so pick something with a detail worth showing, a bold print, a contrasting color, or an interesting neckline.
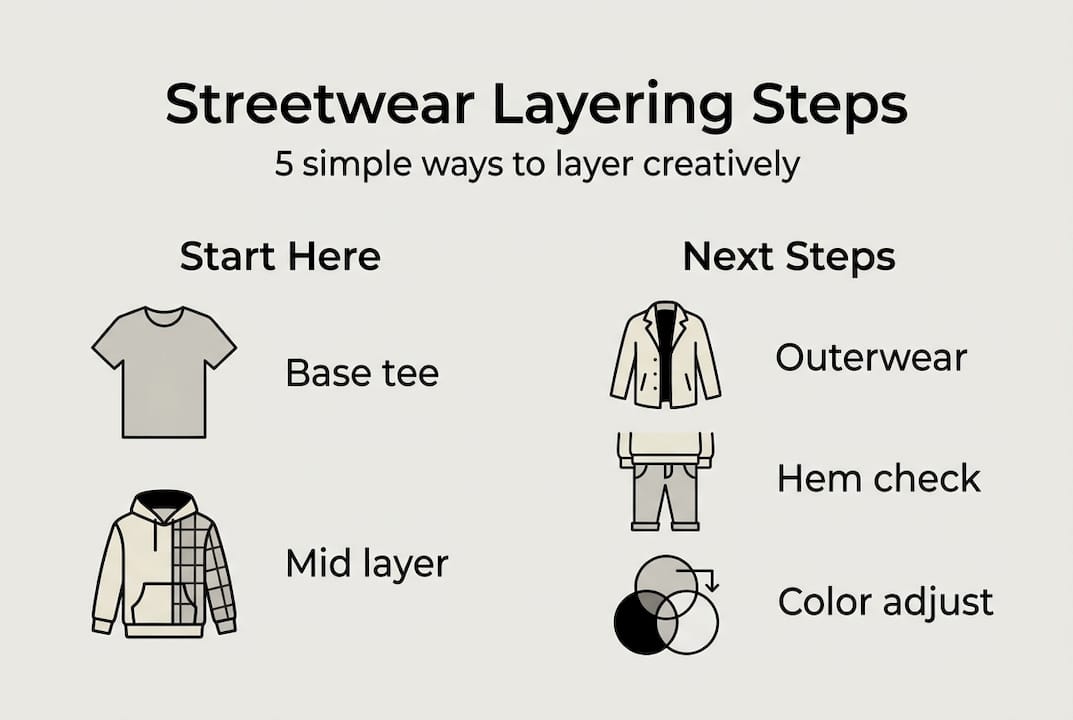
Step 2: Add your mid layer open or partially zipped. An open flannel or unzipped hoodie lets your base breathe and peek through at the chest and hem.
Step 3: Throw on your outer layer. Leave it open unless the weather demands otherwise. Roll or push up the sleeves of your mid layer so all three cuffs are visible at different lengths.
Step 4: Check the hem stack. Each layer should end at a slightly different point. Base longest, mid medium, outer shortest or equal to mid.
Step 5: Adjust for the look you want. Going monochrome? Keep tones close and let texture do the work. Want a color pop? Let your base layer’s graphic or color contrast against a neutral outer.
Designer Spencer Phipps puts it simply: experiment without rules, roll sleeves, make every detail visible. That freedom is what separates streetwear layering from formal dressing.
For trend-driven moves, stacked tees, hoodie under blazer, and graphic tee under mesh are all having a major moment right now. These combos work because they break expected silhouettes. Explore artful layering combos and urban styling tips for more outfit directions.
Pro Tip: For summer layering, swap your outer jacket for a mesh overlay or an open button-up. You keep the depth without the heat.
Avoiding mistakes: Common pitfalls and pro adjustments
Once you start layering, it’s easy to run into problems. Here’s how to sidestep the common ones and level up your approach.
The biggest mistakes most people make:
- Over-layering: More than three layers usually creates bulk, not style. Avoid stacking past three pieces, and when you do go further, keep each layer thin.
- Clashing prints: Two bold graphics fighting for attention cancel each other out. Pair one statement print with solid or subtle textures.
- Same-length pieces: When all your layers end at the same hem, the look reads flat. Stagger lengths intentionally.
- Identical colors: Monochrome works when textures vary. All the same color AND texture just looks like one thick piece.
- Summer bulk: Layering in heat doesn’t mean wearing winter pieces. Stick to lightweight fabrics and open silhouettes.
Tokyo street style solves the bulk problem by starting thin. Lightweight base layers and open, unstructured mid layers keep the look airy even when stacked.
For fine-tuning, practice selective peeking: pull your base layer’s collar above your mid layer’s neckline, or let a long-sleeve cuff extend past your hoodie’s sleeve. These small details signal that your layering is intentional, not accidental.
Pro Tip: Before you leave the house, take a photo of your outfit. Seeing it flat on a screen reveals length mismatches and color clashes that mirrors sometimes miss.
For more refinement, explore street outfit accessorizing and the artistic layering guide to push your looks further.
Making it yours: Personalization and next-level layering inspiration
Once you’ve avoided the common mistakes, the next step is making layering an extension of your creativity.
Layering is more than a styling trick. According to designer Spencer Phipps, layering is a mindset for personal style expression that enables adaptability and individuality. That means your combinations don’t have to follow anyone else’s formula.
Here are ways to make layering feel like yours:
- Use odd combos on purpose. A blazer over a hoodie over a tee sounds wrong until it looks right. Unexpected pairings are where signature style lives.
- Let your mood set the palette. Some days call for all black with one color pop. Others call for clashing prints and maximum energy. Both are valid.
- Draw from different cities. Milan 2026 runways showed hyper-structured outer layers over relaxed basics. Tokyo street style leans into lightweight stacking and asymmetry. Pull from both.
- Try pre-layered clothing for instant complexity. Pieces engineered to look like multiple layers give you a polished stacked look with minimal effort.
- Find your signature move. Maybe it’s always letting your base graphic peek above the collar. Maybe it’s rolling one sleeve higher than the other. Repetition across outfits builds a recognizable personal style.
Explore creative streetwear styles to find your lane, and browse streetwear outfit inspiration for looks you can adapt and make your own.
Why true personal style means breaking the layering rulebook
Here’s something most style guides won’t tell you: the rules exist to be broken, not followed forever. The three-layer structure, the GSM guidelines, the peeking principles, they’re training wheels. They help you build instincts. But the most memorable streetwear looks come from people who learned the system and then ignored it.
We’ve seen it at every major street style moment. The outfits that stop people mid-scroll aren’t the ones that followed every rule perfectly. They’re the ones that took a risk, stacked something unexpected, or wore a piece in a way it wasn’t designed for.
Mistakes teach you more than guides do. The time you wore too many layers and looked like a pile of laundry? That taught you proportion. The time you clashed two prints and it somehow worked? That taught you confidence.
A creative streetwear approach isn’t about copying what’s trending. It’s about using what you know to say something new. Streetwear has always been about authenticity. The rulebook is just a starting point.
Ready to level up? Shop the best layering essentials
Take your new layering skills and translate them instantly with versatile options from the ELED OASIS collection.

Building a layered look starts with pieces that actually work together. Our moisture-wicking tees make the perfect base layer, staying lightweight and breathable whether you’re stacking for style or comfort. Add casual sweats as your mid layer for relaxed structure that lets your base peek through at the hem. Then anchor the whole look with one of our bold graphic tees as a statement base under an open jacket or mesh overlay. Every piece is designed with the kind of detail and intention that makes layering feel effortless and expressive.
Frequently asked questions
How many layers should I wear when layering streetwear?
Stick to a maximum of three layers to keep your outfit balanced and avoid unnecessary bulk. Going beyond three works only when each piece is intentionally thin and lightweight.
What materials work best for summer streetwear layering?
Lightweight jersey and French terry are ideal for warm-weather stacking because they breathe well and don’t add visible weight. Pair them with open silhouettes and breathable colors to keep the look fresh.
Can I mix patterns and colors in layered streetwear outfits?
Mixing patterns is encouraged, but avoid clashing prints or same-length pieces that flatten the look. Start with one bold print and balance it with solid or subtly textured layers.
What’s a quick way to add style to a basic streetwear outfit?
Try stacked tees or a graphic tee under mesh for instant visual complexity. A hoodie under a blazer is another fast move that shifts a casual look into something more intentional.
Is it okay to layer two jackets or coats?
Hyper-layering two jackets is a runway-approved move seen at Milan FW 2026, but keep both pieces lightweight and the overall fit intentional. If it looks accidental, it reads as a mistake rather than a statement.